tie dye socks instructions
Tie-dyeing is a beloved, accessible craft experiencing a resurgence, offering a fantastic way to personalize wardrobe staples like socks.
It’s a simple DIY project requiring minimal supplies, breathing new life into plain white socks with vibrant, unique patterns.
These colorful creations add a playful touch to any outfit, reflecting individuality and a creative spirit, making them incredibly popular.
What is Tie-Dye?
Tie-dye is a remarkably expressive and ancient textile art form, involving the folding, twisting, pleating, or crumpling of fabric – in our case, socks! – before applying dye.
This process creates stunning, unpredictable patterns, making each piece truly one-of-a-kind. Originating centuries ago across various cultures, tie-dye wasn’t always about vibrant colors; historically, it served functional purposes like strengthening fabric.
However, it blossomed into a celebrated art form, particularly gaining prominence in the 1960s and 70s as a symbol of individuality and self-expression. Today, tie-dye is enjoying a significant revival, fueled by a desire for DIY projects and unique fashion statements.
Unlike complex printing techniques, tie-dye relies on resisting dye penetration, achieved through binding the fabric. This resistance, created by rubber bands or string, is what ultimately defines the beautiful, swirling designs we associate with tie-dye.
It’s a wonderfully accessible art form, requiring minimal skill and offering endless creative possibilities.
Why Tie-Dye Socks?
Tie-dye socks offer a fantastic entry point into the world of textile art, being a small, affordable, and relatively quick project. Revamping old, plain white socks is a sustainable and creative way to upgrade your wardrobe without significant expense.
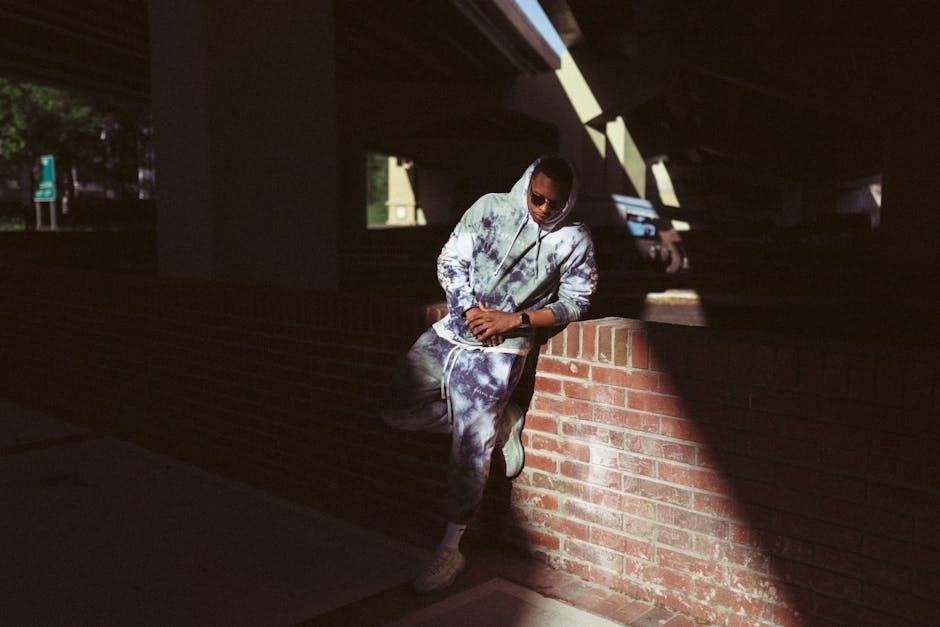
Beyond the cost-effectiveness, tie-dye socks are a brilliant way to express personal style. They inject a playful, vibrant element into any outfit, instantly adding personality and a touch of fun.
Unlike many trends requiring store-bought items, tie-dyeing relies on readily available materials – white socks, dye, and rubber bands – making it a truly accessible craft.
They’re also a fantastic DIY activity for all ages, from sleepovers and summer camps to simply enjoying a creative afternoon. The unpredictable nature of tie-dye ensures that no two pairs are ever exactly alike, guaranteeing a unique and personalized accessory.
Ultimately, tie-dye socks are about embracing creativity and adding a splash of color to everyday life.

Materials Needed for Tie-Dyeing Socks

Successful tie-dyeing requires a few key supplies: white socks, fabric dyes, rubber bands, gloves, a plastic covering, dye applicators, and a mixing bucket.
White Socks: The Best Base
When embarking on a tie-dye adventure, the foundation of your vibrant creation is undoubtedly the sock itself, and white socks reign supreme as the ideal canvas.
The pristine white color provides the purest backdrop, allowing the dyes to express their full brilliance and true hues without any interference from pre-existing colors.
Darker socks simply won’t yield the same level of vibrancy, as the dye struggles to penetrate and showcase its potential.
Opting for 100% cotton socks is also highly recommended, as cotton fibers readily absorb the dye, resulting in a more saturated and long-lasting color payoff.
Synthetic materials, on the other hand, may not hold the dye as effectively, leading to faded or washed-out results.
Consider the sock’s thickness too; thinner socks will generally scrunch and tie more easily, while thicker socks offer a more substantial base for bolder patterns.
Ultimately, a clean, white, cotton sock is your best bet for a stunning tie-dye masterpiece!
Fabric Dyes: Choosing Your Colors
Selecting the right fabric dyes is crucial for achieving the desired aesthetic in your tie-dye socks, opening a world of colorful possibilities.
Fiber reactive dyes are widely considered the gold standard for tie-dyeing, particularly for cotton, as they form a permanent bond with the fabric, ensuring vibrant and wash-fast colors.
These dyes come in powder or liquid form, offering a wide spectrum of shades to suit your creative vision.
Consider the color theory – complementary colors (like blue and orange) create striking contrasts, while analogous colors (like blue and green) offer a harmonious blend.
Don’t be afraid to experiment with mixing dyes to create custom shades!
Pre-mixed tie-dye kits are also available, providing a convenient all-in-one solution for beginners, though they may offer a limited color palette.
Always read the dye instructions carefully and choose dyes specifically formulated for fabric to guarantee optimal results and lasting vibrancy.
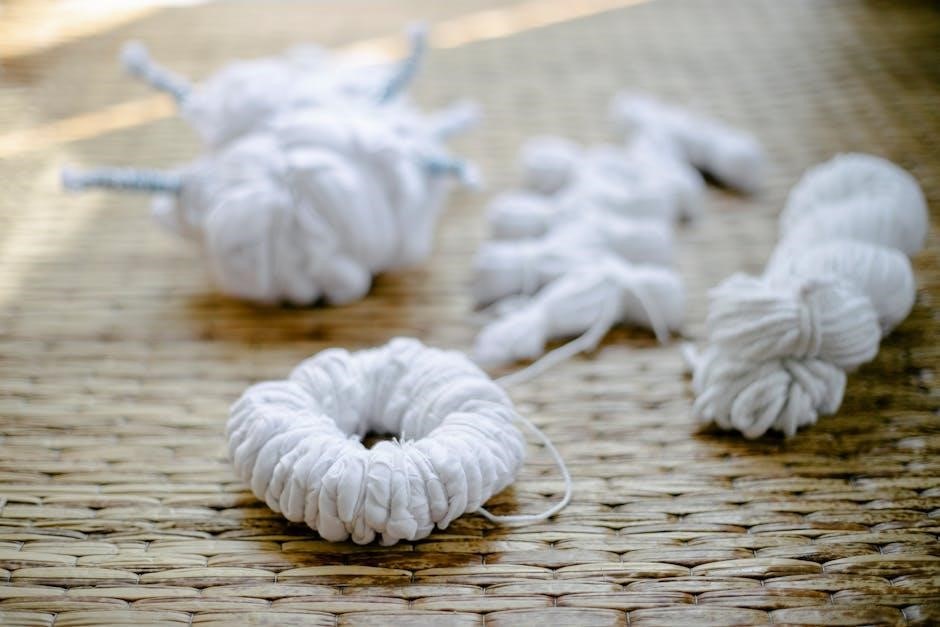
Rubber Bands or String: Securing the Patterns
Rubber bands and string are essential for creating the distinctive patterns in tie-dye, acting as barriers that resist the dye and define the design.
Rubber bands are generally preferred for tighter, more defined patterns like spirals and bullseyes, providing strong, consistent tension.
Use a generous number of rubber bands, wrapping them tightly and closely together to prevent dye from seeping into unwanted areas.
String, particularly cotton or synthetic string, is ideal for creating linear patterns like stripes or more complex, intricate designs.
Wrapping the sock tightly with string allows for precise control over dye placement.
The tightness of the binding directly impacts the final result; tighter binding yields sharper lines and more defined patterns.
Experiment with different binding techniques to achieve a variety of effects, and ensure the bands or string are securely fastened to prevent unraveling during the dyeing process.
Gloves: Protecting Your Hands
Protecting your hands is paramount when working with fabric dyes, as these chemicals can cause skin irritation, staining, and even allergic reactions.
Disposable gloves, typically made of nitrile or latex, are the most practical choice for tie-dyeing, offering a barrier against direct contact with the dye.
Nitrile gloves are recommended for those with latex allergies, providing a safe and effective alternative.
Ensure the gloves fit snugly but comfortably, allowing for dexterity while handling the socks and dye solutions.
Always wear gloves throughout the entire process – from mixing the dyes to applying them and rinsing the socks.
Even seemingly mild dyes can cause discoloration or sensitivity, so consistent protection is crucial.
Dispose of the gloves properly after use, avoiding any contact with skin when removing them, to prevent accidental staining or irritation.
Plastic Drop Cloth or Covering: Protecting Your Workspace
Protecting your work surface is essential when tie-dyeing, as the dyes can permanently stain almost any material. A plastic drop cloth or covering provides an impermeable barrier against spills and splatters.
Old plastic tablecloths, painter’s plastic sheeting, or even large garbage bags can be effectively used to cover your workspace.
Ensure the covering extends beyond the immediate work area, providing ample protection against accidental dye drips.
Consider working outdoors if weather permits, as this minimizes the risk of indoor staining and provides better ventilation.
If working indoors, choose a well-ventilated area to avoid inhaling dye fumes.
Secure the plastic covering with tape to prevent it from shifting during the tie-dyeing process.
Clean up any spills immediately, even on the plastic covering, to prevent the dye from setting and becoming more difficult to remove.
Squeeze Bottles or Applicators: Dye Application
Precise dye application is key to achieving vibrant and well-defined tie-dye patterns on your socks. Squeeze bottles or specialized dye applicators are invaluable tools for this purpose.
Squeeze bottles allow for controlled dispensing of the dye, preventing oversaturation and ensuring even distribution.
Applicator bottles with fine tips are particularly useful for intricate designs and detailed work.
Alternatively, you can use small paintbrushes or even syringes (without needles, of course!) for targeted dye placement.
Pre-fill your squeeze bottles with the prepared dye mixtures to streamline the application process.
When applying the dye, gently squeeze the bottle, directing the flow onto the fabric.
Avoid shaking the bottles vigorously, as this can introduce air bubbles and affect the dye’s consistency.
Bucket or Container: For Dye Mixing
A dedicated bucket or container is essential for safely and effectively mixing your fabric dyes. Choose a plastic container – avoid metal, as it can react with certain dyes.
The size of the container will depend on the quantity of dye you’re preparing; a gallon-sized bucket is generally sufficient for a sock tie-dye project.
Ensure the container is clean and free of any residue that could contaminate the dye.
When mixing, always follow the dye manufacturer’s instructions carefully, adding water to the dye powder gradually.
Stir thoroughly with a plastic spoon or stick until the dye is completely dissolved and the solution is uniform in color.
Label each container clearly with the dye color to avoid confusion during the application process.
Having separate containers for each color prevents accidental mixing and ensures vibrant, distinct patterns on your tie-dye socks.

Tie-Dye Techniques for Socks
Numerous techniques unlock diverse sock designs, from the iconic spiral and bold stripes to unique scrunch and geometric fold-and-clamp patterns.
Experimentation is key to achieving personalized, vibrant results, transforming plain socks into wearable art.
Spiral Tie-Dye: A Classic Design
The spiral technique is arguably the most recognizable and beloved tie-dye pattern, perfect for socks and offering a visually striking result.
Begin by laying your damp sock flat. Pinch the fabric at the center point, then twist it into a tight, flat spiral, resembling a cinnamon roll.
Secure the spiral firmly with multiple rubber bands, dividing it into wedge-like sections – the more bands, the more defined the pattern.
Apply different dye colors to each section, ensuring the dye penetrates the fabric. Flip the sock and repeat the dyeing process on the other side.
Allow the dye to set for the recommended time, then rinse thoroughly with cold water until the water runs clear. This classic method guarantees a vibrant, eye-catching sock!
Remember to wear gloves to protect your hands during the dyeing process, and work on a protected surface to avoid staining.
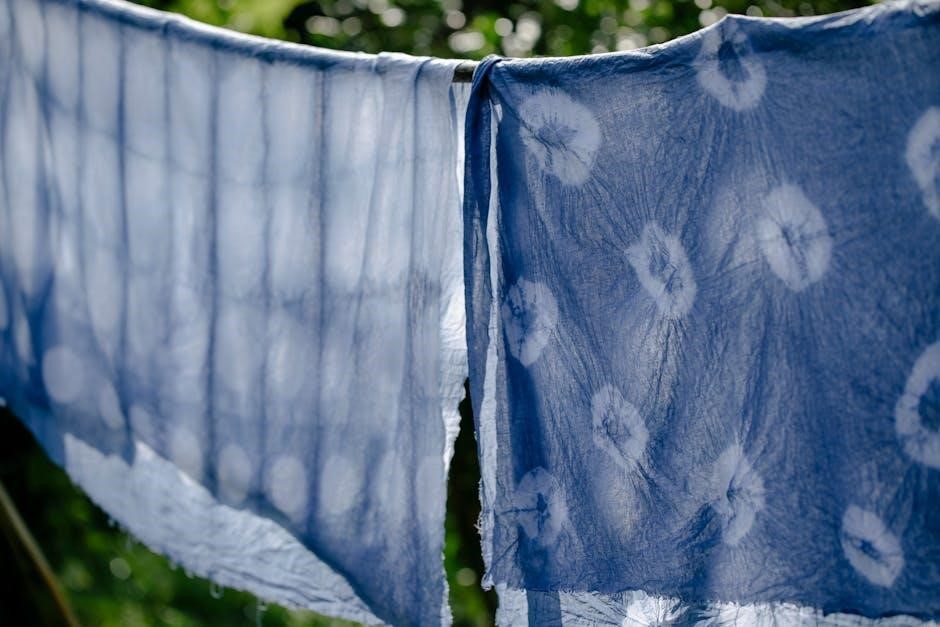
Bullseye Tie-Dye: Concentric Circles
Creating a bullseye pattern on socks involves pinching and tying sections of the fabric to form concentric circles when dyed.
Start with a damp sock and pinch a section of fabric, then secure it tightly with a rubber band. Continue pinching and banding sections alongside the first, creating a line of bound areas.
Repeat this process on the opposite side of the sock, ensuring the bands align to form circular shapes when the sock is stretched.
Apply different dye colors to each banded section, working from the center outwards. This creates the distinct concentric circle effect.
Allow the dye to set, then rinse thoroughly with cold water until the water runs clear. The result is a vibrant, circular design!
Experiment with color combinations for a unique look, and remember to protect your workspace from dye splatters.
Stripes Tie-Dye: Simple and Bold
Achieving a striped tie-dye effect on socks is one of the easiest techniques, perfect for beginners seeking a bold, graphic look.
Begin with a damp sock and fold it accordion-style, creating neat, even pleats along its length. Secure the folded sock tightly with multiple rubber bands spaced evenly apart.
These rubber bands will act as barriers, preventing the dye from bleeding into adjacent sections, thus forming distinct stripes.
Apply different dye colors between each rubber band, ensuring each section receives adequate coverage. Consider alternating colors for a classic striped pattern.
Allow the dye to set for the recommended time, then rinse thoroughly with cold water until the water runs clear. Remove the rubber bands to reveal your vibrant stripes!
This method offers a clean, impactful design with minimal effort, making it a great starting point for tie-dye exploration.
Scrunch Tie-Dye: Random and Unique
The scrunch tie-dye technique is celebrated for its unpredictable and wonderfully unique results, ideal for those embracing a more free-form aesthetic.
Start with a damp sock and simply scrunch it up randomly, gathering the fabric into a compact, irregular shape. Secure the entire scrunch tightly with multiple rubber bands;
The more rubber bands you use, and the tighter you secure them, the more intricate and varied the pattern will become.
Now, apply dye liberally across the scrunched sock, allowing the colors to blend and mingle organically. Flip and repeat on all sides for full coverage.
Let the dye set, then rinse and remove the rubber bands to unveil a mesmerizing, one-of-a-kind design. No two scrunch socks are ever alike!
This method is incredibly forgiving and perfect for experimenting with color combinations and achieving an effortlessly cool look.
Fold and Clamp Tie-Dye: Geometric Patterns
The fold and clamp technique unlocks the potential for creating precise, geometric patterns on your tie-dye socks, offering a more structured approach.
Begin by folding your damp sock accordion-style, creating neat, even pleats along its length. Then, firmly clamp the folded sock with several evenly spaced clamps – clothespins or specialized tie-dye clamps work well.
These clamps act as resists, preventing dye from penetrating those areas and defining sharp lines in your design.
Apply dye strategically between the clamps, utilizing different colors for distinct sections. Ensure the dye saturates the exposed fabric thoroughly.
After the dye has set, carefully remove the clamps and rinse the sock to reveal a striking pattern of geometric shapes and vibrant color blocks;
This method requires a bit more precision but yields incredibly rewarding and visually impactful results.
The Tie-Dye Process: Step-by-Step
Embarking on your tie-dye journey involves preparing socks, skillfully applying dye, patiently waiting for it to set, and finally, washing and drying.
Each step is crucial for achieving vibrant, long-lasting results.

Preparing the Socks: Washing and Dampening
Before diving into the colorful world of tie-dye, proper sock preparation is absolutely essential for optimal dye absorption and a stunning final result. Begin by thoroughly washing your white socks – this removes any sizing or finishes applied during manufacturing that could resist the dye, ensuring even color distribution.
Avoid using fabric softener during the wash cycle, as it can create a barrier preventing the dye from properly bonding with the fabric. Once washed, the socks need to be damp, not soaking wet, before you begin tying and applying dye. Damp fabric allows the dye to spread and blend more effectively than completely dry fabric.
You can achieve the ideal dampness by either rinsing the socks well after washing and then squeezing out the excess water, or by lightly misting them with water just before you start the tying process. This crucial step sets the stage for vibrant, beautifully patterned tie-dye socks!
Applying the Dye: Techniques and Tips
With your socks tied and ready, it’s time to unleash the color! Using squeeze bottles or applicators, carefully apply the fabric dye to the different sections created by your chosen tie-dye technique. Remember to saturate the fabric well, ensuring the dye penetrates all layers for a rich, vibrant hue.
For a more blended look, apply multiple colors adjacent to each other; the dye will naturally bleed and mix. Don’t be afraid to experiment with color combinations – that’s part of the fun! If using multiple colors, work methodically to avoid muddying the shades too much.
A helpful tip is to flip the socks over and repeat the dye application on the other side, ensuring even coverage. Be mindful of drips and protect your workspace accordingly. Remember, the amount of dye used will influence the intensity of the color, so adjust accordingly!
Waiting and Rinsing: Setting the Dye
Once the dye is applied, the waiting game begins! This crucial step allows the dye to fully bond with the fabric fibers, setting the color and preventing it from washing out. Typically, a waiting period of 6-8 hours is recommended, but for the most vibrant results, consider letting the socks sit for a full 24 hours.
To begin rinsing, start with cold water – hot water can cause the dye to run. Gently remove the rubber bands or string, continuing to rinse under cold water until the water runs clear. This may take some time, so be patient!
Initially, some dye will still release, so rinse separately to avoid staining other items. Once the water runs clear, you’ve successfully set the dye, and your socks are ready for the final wash!
Washing and Drying: Final Steps
After rinsing, it’s time for the final wash! Place your newly tie-dyed socks in the washing machine with cold water and a mild detergent. To minimize color bleeding, wash them separately from other clothes for the first few washes. A color catcher sheet can also be a helpful addition during this initial stage.
Once washed, you can either tumble dry on a low heat setting or, even better, hang them to dry. Hanging them to dry helps preserve the vibrancy of the colors and prevents potential shrinkage. Avoid direct sunlight, as it can cause fading over time.
With these final steps completed, your unique tie-dye socks are ready to wear and enjoy, adding a splash of color to your wardrobe!
Caring for Your Tie-Dye Socks
Proper care ensures your vibrant tie-dye socks stay colorful and fresh! Washing them correctly and avoiding harsh conditions will maintain their unique beauty.
Follow these guidelines for long-lasting, eye-catching socks.
Washing Instructions: Maintaining Vibrancy
To preserve the brilliant colors of your tie-dye socks, adopting specific washing practices is crucial. Always wash them inside out before their initial use, and continue this method for subsequent washes. This minimizes friction and color fading during the wash cycle.
Use cold water exclusively; hot water can cause the dyes to bleed and diminish the vibrancy of the patterns. Opt for a mild detergent, avoiding those containing bleach or optical brighteners, as these can strip the color.
Wash your tie-dye socks with similar colors to prevent any potential dye transfer. A gentle cycle on your washing machine is recommended, reducing stress on the fabric and preserving the design. Avoid harsh agitation or excessive spinning.
Consider hand washing for delicate or particularly vibrant socks, ensuring a thorough yet gentle cleaning process. This method offers maximum control and minimizes the risk of color loss.
Avoiding Color Bleeding: Best Practices
Color bleeding is a common concern with tie-dye, but several preventative measures can be taken. Before the first wash, soak your newly dyed socks in cold water with a tablespoon of white vinegar for about 30 minutes. This helps set the dye and minimize initial bleeding.
Always wash tie-dye socks separately or with items of similar colors, especially during the first few washes. Avoid washing them with light-colored fabrics that could easily absorb stray dye.
Using a color-catching sheet in the washing machine can absorb any released dye, preventing it from redepositing onto other clothes. These sheets are readily available in most laundry supply stores.
When drying, avoid high heat, as this can set any remaining loose dye. Air drying is the safest option, but if using a dryer, select a low heat setting. Remember, patience is key to maintaining vibrant, bleed-free tie-dye!

Tie-Dye Sock Style Guide
Tie-dye socks inject personality into outfits! Pair them with jeans for a casual vibe, or shorts for a playful summer look.
Sneakers complete the comfortable, colorful aesthetic, showcasing your unique style effortlessly.
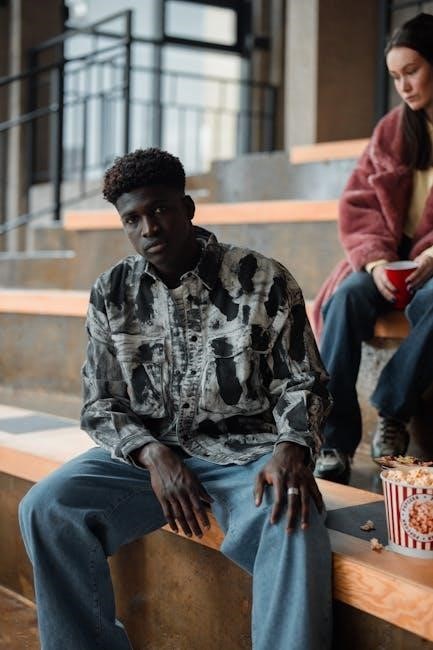
Pairing with Jeans
Tie-dye socks and jeans create a classic, effortlessly cool combination, perfect for a range of styles. For a relaxed, everyday look, consider pairing brighter, bolder tie-dye socks with classic blue denim – think vibrant spirals or bullseyes peeking out from sneakers or boots.
Cropped jeans offer a fantastic opportunity to showcase your tie-dye socks, making them a focal point of your outfit. Tucking the socks into the jeans creates a deliberate, fashionable statement. Alternatively, with straight-leg or wider-leg jeans, allow the socks to bunch slightly at the ankle for a more laid-back feel.
Don’t be afraid to experiment with different washes of denim! Lighter wash jeans complement pastel tie-dye patterns, while darker washes provide a striking contrast to brighter, more saturated colors. Black jeans offer a particularly bold backdrop, allowing the tie-dye to truly pop. This pairing is versatile enough for casual outings, weekend adventures, or even adding a touch of fun to a more dressed-up ensemble.
Pairing with Shorts
Tie-dye socks paired with shorts embody a carefree, summery vibe, ideal for warmer weather and relaxed occasions. Denim shorts are a particularly versatile choice, mirroring the successful combination with jeans – brighter tie-dye patterns add a playful contrast to the denim’s neutral tone.
Chino shorts in khaki, navy, or olive green offer a more sophisticated base, allowing the tie-dye socks to inject a pop of color and personality. For a bolder statement, consider pairing tie-dye socks with brightly colored shorts, but ensure the colors complement each other rather than clash.
The length of the shorts also plays a role; shorter shorts showcase more of the sock, making them a more prominent feature. Don’t hesitate to experiment with different styles – athletic shorts, cargo shorts, or even tailored shorts can all work beautifully with the right tie-dye sock design. Complete the look with sandals, sneakers, or boat shoes for a comfortable and stylish ensemble.
Pairing with Sneakers
Tie-dye socks and sneakers create a dynamic, casual look, perfect for everyday wear and expressing individual style. White sneakers are a classic pairing, allowing the vibrant colors of the tie-dye to truly stand out – this combination offers a clean, fresh aesthetic.
However, don’t shy away from colored sneakers! Matching or complementing the sock’s dye colors with your sneakers can create a cohesive and intentional outfit. For example, tie-dye socks with shades of blue and purple would pair well with lavender or navy sneakers.
High-top sneakers offer more sock visibility, making them an excellent choice for showcasing intricate tie-dye patterns. Low-top sneakers work equally well, providing a more subtle accent. Experiment with different sneaker styles – canvas, leather, or athletic – to find what best suits your personal taste and the overall look you’re aiming for.